此内容根据文章生成,并经过人工审核,仅用于文章内容的解释与总结
一、前置条件
- 已在本地电脑安装hexo
- 具备一台服务器
- 服务器已安装宝塔
二、服务器环境搭建
1. 添加Git用户
1
2
3
4
5
6
7
8
9
10
11
12
13
14
15
16
17
| #安装git
yum install -y nginx git
#添加Git用户,并设置Git登录密码
useradd git
passwd git
# 给git用户配置sudo权限
chmod 740 /etc/sudoers
# 找到root ALL=(ALL) ALL,在它下方加入一行
vim /etc/sudoers
git ALL=(ALL) ALL
# 将权限改回
chmod 400 /etc/sudoers
|
2. 给git用户添加ssh秘钥,实现服务器免密登录
1
2
3
4
5
6
7
8
9
10
11
12
13
14
15
16
17
18
19
20
21
22
23
24
25
26
27
| # 注意:本地电脑需要生成git秘钥,执行一下命令
sudo ssh-keygen -t rsa -C "你的email地址"
回车后提示输入密码,此处密码可以不填, 直接回车,提示再次输入密码, 直接回车,生成成功。
# 查看本地电脑上SSH key,并copy
cat ~/.ssh/id_rsa.pub
# 登录远程服务器
ssh root@xx.xx.xx.xx
# 切换用户为git用户
su git
# 新建一个.ssh文件夹
mkdir -p ~/.ssh
# 新建一个.authorized_keys
touch ~/.ssh/authorized_keys
# 该权限是保证git用户免密登录推送文件必要步骤
chmod 600 ~/.ssh/authorzied_keys
chmod 700 ~/.ssh
# 将电脑上的ssh密钥粘贴进去
vim ~/.ssh/authorized_keys
|
3. 服务器创建Git仓库并使用Git-hooks实现自动部署
1
2
3
4
5
6
7
8
9
10
11
12
13
14
15
16
17
18
19
20
21
22
23
24
25
| # 新建目录,作为git仓库的位置
sudo mkdir -p /var/repo
# 新建目录,作为hexo部署静态文件的地址
sudo mkdir -p /www/wwwroot/hexo
# 转到git仓库的文件夹
cd /var/repo
# 创建一个名叫blog的仓库,并打开Git-hooks配置文件
sudo git init --bare blog.git
sudo vim /var/repo/blog.git/hooks/post-update
# post-update内添加内容
#!/bin/bash
git --work-tree=/www/wwwroot/hexo --git-dir=/var/repo/blog.git checkout -f
# 给post-update授权
cd /var/repo/blog.git/hooks/
sudo chown -R git:git /var/repo/
sudo chown -R git:git /var/www/hexo
#赋予其可执行权限
sudo chmod +x post-update
|
到这里,整个Git仓库的配置已经完成,接下来就进入Nginx服务的部署。
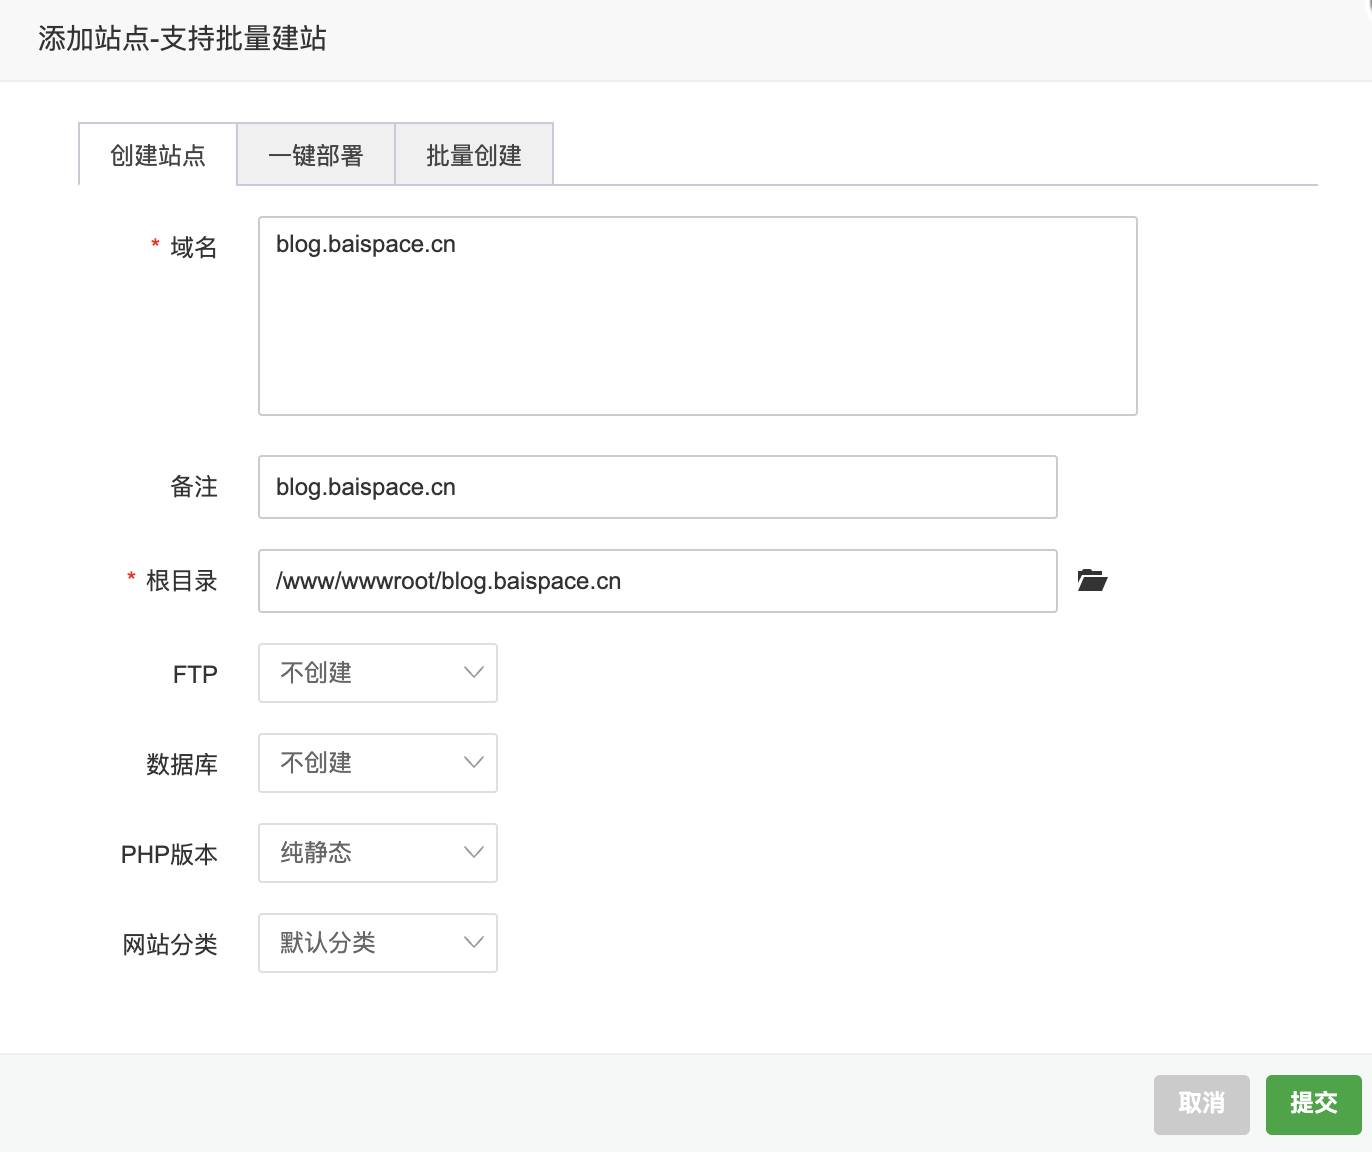
三、宝塔Nginx服务部署
打开宝塔后台,创建新的站点。需要填写的内容,域名(网站博客的域名,需要提前解析到服务器),根目录(上文设置的hexo静态资源文件)、PHP版本设置为纯静态。
四、修改本地Hexo配置文件
1. 修改Hexo配置文件
进入本地电脑hexo博客的根目录,编辑站点配置文件 _config.yml,找到deploy,修改内容。
1
2
3
4
5
6
| deploy:
type: git
# repo改为repo:git@你的ip:/var/repo/hexo.git
repo: git@xx.xx.xx.xx:/var/repo/hexo.git
branch: master
|
2. 部署提交网站
五、打开你的博客hexo网站